Have you ever tried to fix a glass furniture, a window or door pane, etc to get a better fitting and you were frustrated because you ended up destroying your (probably very expensive) furniture while trying to fix it? The truth is that whether you are fixing a glass furniture or doing some other project, glass cutting is a really fascinating piece of skill that is very necessary. The most beautiful part is, it is not very difficult to learn. Have doubts? This article will show you how to cut glass in 5 little and stress-free steps. Follow them and with constant practice, you will soon be able to cut your glasses yourself in the comfort of your home.
How To Cut Glass In 5 Simple Steps
Step 1: Have Everything You’ll Need In Place
In having everything you need put in place, you will first have to prepare your workstation. You’ll need a smooth and flat surface. Your work must not be too hard so it doesn’t damage the glass and it should be easy to clean. Remember that a rug surface is a no-no when choosing your workspace as glass pieces can easily hide underneath it and cause harm.
You will need the glass (maybe 3 or 4 mm thick), a glass cutter, oil/lubricant, a measuring tape and a straight rule.
Read: Best Tea Kettles: Electric, Whistling, Glass Tea Kettles
Note that there are two kinds of glasscutters. The one that has a wooden handle is cheaper and easy to find, has spare cutting wheels, but no oil compartment. So the application of oil on the glass is rather manual. The other one has it’s own oil compartment and supplies the oil to the surface of the glass as you push the handle upwards and downwards.
Step 2: Get Your Measurements Inch-Perfect
With glasses, there is almost no room for miscalculations. so you must prepare your measurements and get them perfectly accurate right from the start.
Step 3: Score The Glass
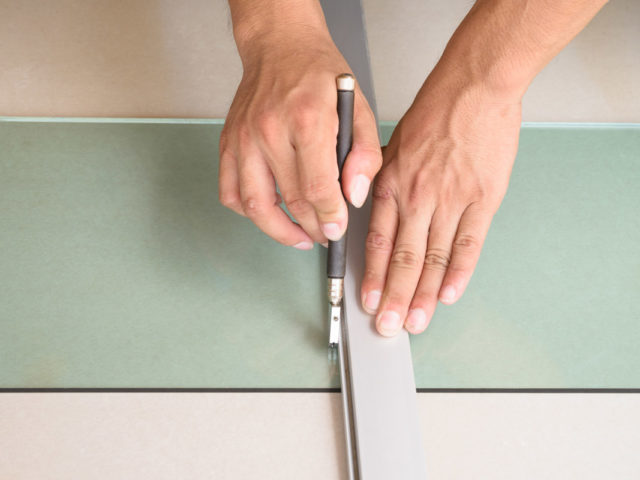
Scoring/cutting the glass involves making a shallow impression – like marking a line on the glass with the intention of breaking it into two. It makes a split in the surface of the glass which encourages the glass to break along that line.
The score must run from one edge of the glass to the other edge. Always start from the edge on which you ended the score. If you try to run it from the starting edge, there’s a better chance that the glass will not break out well, or at least with more difficulty. The reason is, when you start a score, you do not start exactly on the edge of the glass. However, you do end the score by rolling over the edge of the glass. So, the edge that you end on is always the best place to start running the score.
Read: Best Electric Pencil Sharpeners
Score only once! If you feel you did not get the scoring accurately, you can do that particular part you didn’t get properly again. It is, however, better to get the scoring in one move.
You must note that your scores should not be too long. A very long score has a higher percentage of damaging the glass when breaking.
Step 4: Breaking And Smoothing
If you have done a good job with the step 3 above, then you would have done 80 percent of this part. A neatly made score should make the breaking part much easier, but you should definitely be scared if you did not get the scoring right.
There are several ways you could go about breaking off a glass after scoring it (or rather after giving it the PERFECT SCORE!). You could just hit the glass on the opposite sides of the score. This would make the glass break from the score point but this method would only be recommended if the glass is thick enough to withstand the hit.
The safest method of breaking would be to grasp each side of the glass you have scored carefully in your hand and hold the glass as if you were trying to break a chocolate bar or sausage roll in half with two hands then tilt your hand (apply very little pressure around the wrist region), the glass will; respond to that twist by breaking along the scooerd line(s).
When the breaking is done, you should smoothing the sharp edges using a sandpaper or a sharpening stone. This gives more strength to the edges of your glass as well as prevent the sharp edge from slicing anyone who carries it.
See Also: Best Insulated, Glass, Stainless Steel, Filtered Water Bottles
Step 5: Now, Do It!
It’s simple, isn’t it? Now that you have seen it, the next step now is for you to do it! We hope this will help you learn how to cut glass.That’s how you cut glass.
Watch a video that shows the steps listed above:


